Contribution Guide
First, please contact us via our contact form. Some tests are data dependent. Please request access to this data. The access is free of charge and without any obligation.
The Architecture SDK to Server can be useful for details about how the Konfuzio SDK interacts with the Konfuzio Server.
Internal release process
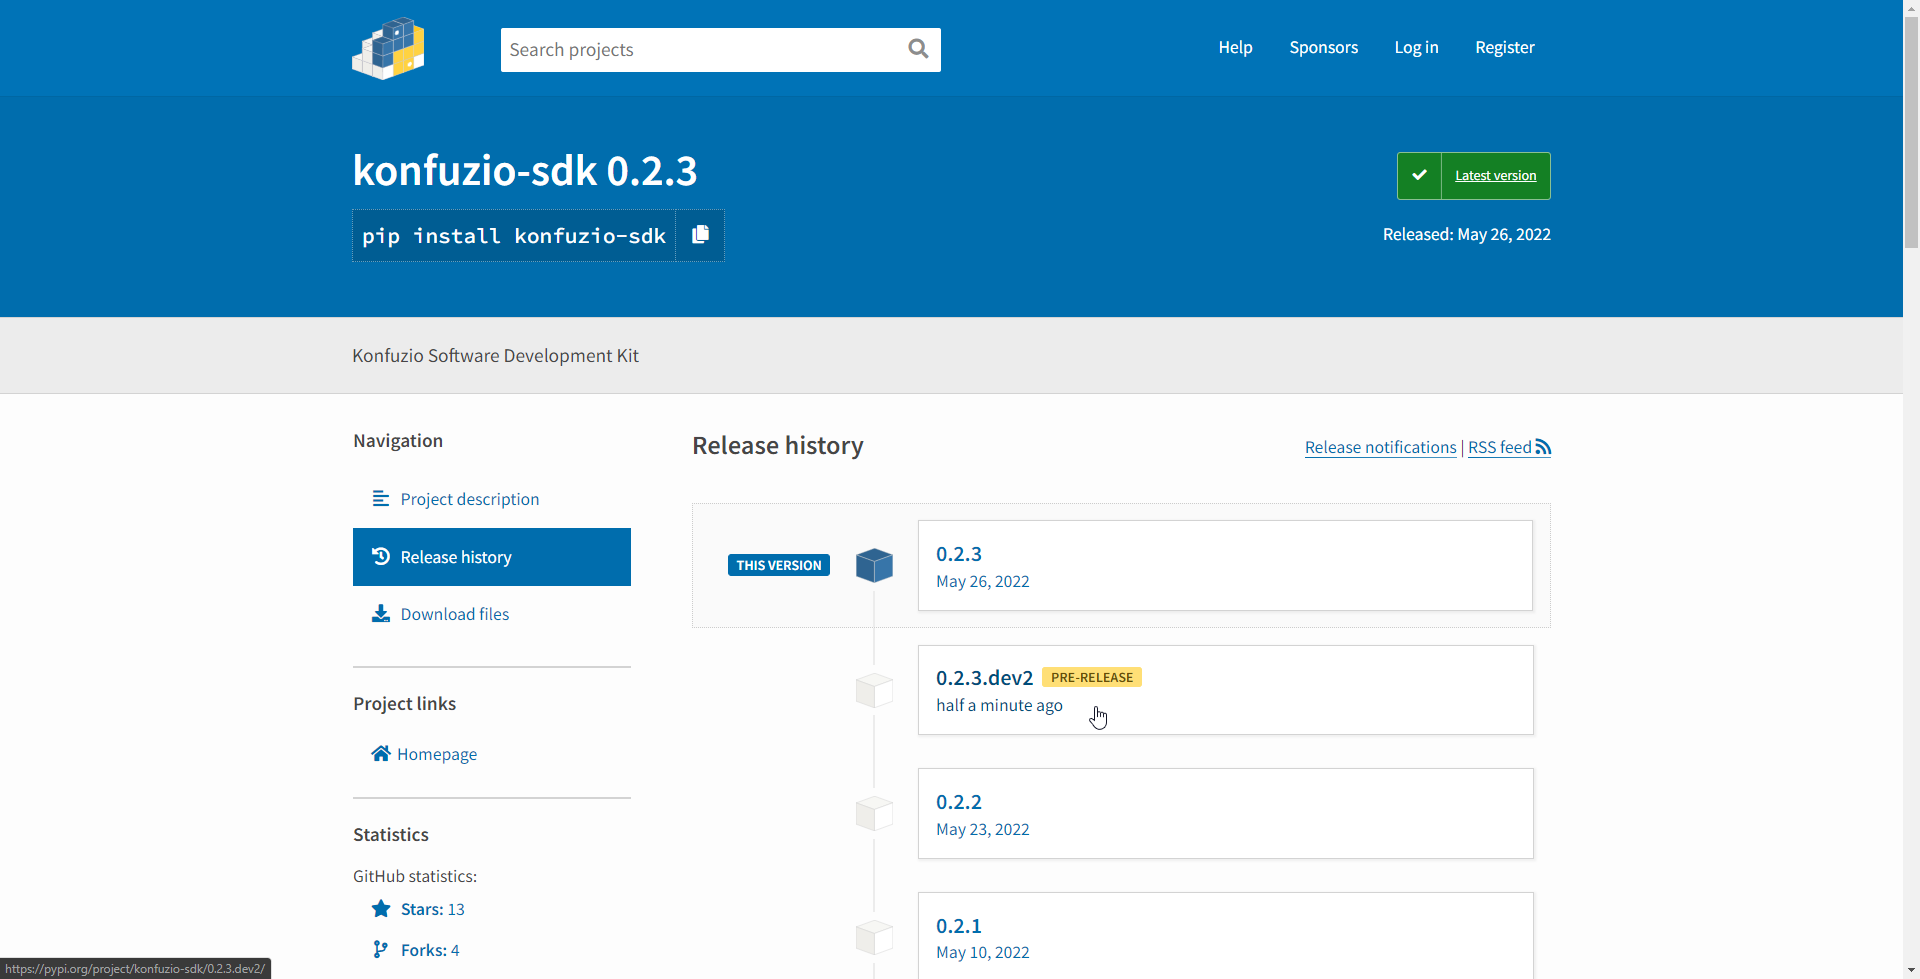
Every day when there is a verified and approved change a new pre-release of the SDK (master branch) is released to https://pypi.org/project/konfuzio-sdk/#history at 5:19 AM UTC (3:19 AM UTC+2).
Every day when there is a verified and approved change a new pre-release of the DVUI (main branch) is released to https://www.npmjs.com/package/@konfuzio/document-validation-ui?activeTab=versions at 5:19 AM UTC (3:19 AM UTC+2, see code here).
Every day at 6:13 AM UTC a new nightly internal release of the Server using the latest pre-release of the SDK and the DVUI is deployed at https://testing.konfuzio.com/ as a Gitlab schedule from our Server repository.
We get an early chance to find bugs with our integration of the SDK and the DVUI with the Konfuzio Server before the official release. During our internal development sprints (2 week periods) we follow the strategy summarized in the table below.
Key |
Meaning |
|---|---|
T |
Testing Time |
M |
Merge to next level |
R |
Release |
B |
Bug Fixing |
CF |
Code-Freeze |
The strategy follows a 2 weeks sprint schedule (10 work days). The last five days from the diagram (+1 to +5) are not part of the sprint, but part of the final verification process). These additional days, in which final verification and validation is done, overlap with the first week of the next sprint. The SDK process is described in the following plan. The process with DVUI is completely analogous:
During the sprint we do development on the SDK / Server / DVUI side, and we open one pull request for each new SDK feature on Github.
Once a pull request has passed the tests and has been reviewed it is merged to master, which triggers the creation of a SDK pre-release. This becomes available as a Konfuzio Server deployment the next day at https://testing.konfuzio.com/, as a consequence of a Konfuzio Server Gitlab schedule. This is an ongoing process and happens on demand.
We internally test the Konfuzio SDK/Server integration with the latest pre-release and collect any bugs that come up, either from the SDK side or the Server side. These are scheduled as internal tickets for fixing until the second Friday, which marks the end of the sprint.
The latest pre-release of the DVUI/SDK is used for testing the server after the end of the sprint. If there is a bug in the pre-release, it gets fixed and the final official release is published on the fourth day after the end of the sprint. If there is no bug, the pre-release is made to an official release.
SDK Release Notes are automatically generated from our pull requests using the Github’s feature. Each pull request includes links to relevant documentation about how to use the new feature.
All Server changes developed during the sprint are merged on the last day of the sprint - the second Friday. This final version of the Server, using the latest pre-releases of the SDK and DVUI, is deployed on https://testing.konfuzio.com/.
The days after the sprint (+1 to +2) are used for Testing (happens on the Monday following the sprint - day ‘+1’) and Bug Fixing (happens on the Tuesday following the sprint -day ‘+2’) the version of the Server deployed on https://testing.konfuzio.com/. On the Wednesday after the sprint (day ‘+3’) the testing branch is merged to the master branch. On the Thursday after the spint (day ‘+4’) is time for the official release of the Server: the verified final version of the Server is delpoyed to the production environment on https://app.konfuzio.com/.
Documenting the official release of the Server: see the changelog for full information about each Konfuzio official Server release.
How to release with GitHub to PyPI
Change the version number in the file VERSION use the format
v.X.X.Xwithout whitespaces.
Draft a Release.
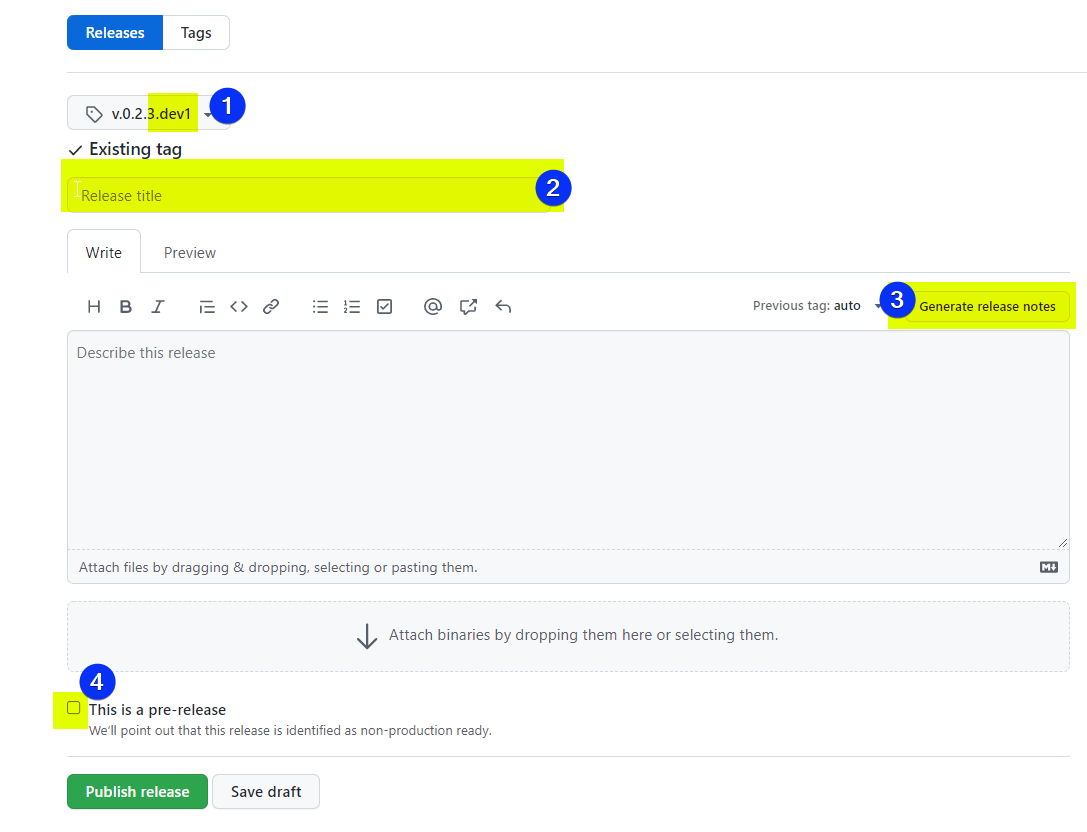
Create a new Tag on master, named as the version number in step 1.
Add a title for the release
Automatically generate the description using the Names of the merged Pull Requests
After you press publish release, a new Python Package will be uploaded to PyPI by a GitHub Action. You can verify that the Release was uploaded via having a look on PyPI


How to use nightly builds?
Install the latest pre-release
pip install --pre konfuzio_sdkForce to pick the latest pre-release the version
pip install konfuzio_sdk>=0.2.3.dev0. As PEP440 states: The developmental release segment consists of the string .dev, followed by a non-negative integer value.
Developmental releases are ordered by their numerical component, immediately before the corresponding release (and before any pre-releases with the same release segment), and following any previous release (including any
post-releases)
Note
Pre-Releases don’t use tags but reference commits. The version number of a pre-release relates to the Year-Month-Date-Hour-Minute-Second of last commit date on branch master used to create this release. This process allows publish a new package if there are new commits on the master branch.

How to open a PR
If you would like to contribute, please use the development installation and open a PR with your contributions.
clone the project in your working directory
git clone https://github.com/konfuzio-ai/konfuzio-sdk.gitgo inside the project folder
cd konfuzio-sdkInstall a project in editable mode (i.e. setuptools “develop mode”) from the current project path. If you want to install a lightweight instance of the SDK, use the following command:
pip install -e .[dev]
If you want to install a full instance, add ai to the list of extras:
pip install -e .[ai,dev]
Initialize the connection to create an
.envfile that stores your credentials to later connect to the host of the Konfuzio Server:konfuzio_sdk initCreate a branch to work that allows you to create a pull request later on:
git checkout -b new_branchWe’re using pre-commit hooks to ensure all code is properly formatted with Ruff. To use the hooks that are default to the SDK’s repository, run:
pre-commit installAutomatic inspections will run in your commits ensuring they match the code formatting of the repository.
It’s also recommended to integrate Ruff directly within your editor so that it runs on every save and highlights potential issues. You can find the instructions here.
Make sure your upstream repo is the original konfuzio-sdk repo:
https://github.com/konfuzio-ai/konfuzio-sdk.gitOtherwise, add it:
git remote add upstream https://github.com/konfuzio-ai/konfuzio-sdk.git
Now you can start to make changes.
Commit your changes. Keep the message short but informative; use prefixes like “Added:”, “Changed:” and proceed with the exact matter that has been altered in your commit.
git commit -m "message"Push your changes to your remote branch:
git push
Once you push the changes to your repo, the Compare & pull request button will appear in GitHub.
Tests will automatically run for every commit you push to the GitHub project.
You can also run them locally by executing pytest in your terminal from the root of this project.
The files/folders listed below are ignored when you push your changes to the repository.
.env file
.settings.py file
data folder
konfuzio_sdk.egg-info folder
IDE settings files
docs/build/ folder
*.pyc files
Note: If you choose another name for the folder where you want to store the data being downloaded, please add the folder to .gitignore.
Running tests locally
Some tests do not require access to the Konfuzio Server. Those are marked as “local”.
To run all tests, do:
pytest
To run only local tests, do:
pytest -m 'local'
To run tests from a specific file, do:
pytest tests/<name_of_the_file>.py
Running tests in Docker
If you have problems with the dependencies, a solution could be to use a docker to run the code. Check here the steps for how to run/debug Python code inside a Docker container.
General Motivation for using the VS Code Remote Development Extension
When it comes to running your code consistently and reliably, container solutions like Docker can play to their strengths. Even if you are not using Docker for deployment, as soon as you collaborate with other developers testing pipelines have to be in place to ensure that a new merge does not accidentally break the whole project. Collaborating can also mean very different operating systems and configurations that lead to varying behaviors on different machines. This issue is also commonly resolved using Docker. But this of course means that there can be differences between your local machine and the Docker container when it comes to dependencies, which leads to tedious dependency management and prolonged feedback loops (especially on Windows) as you have to wait to see if the code you build really runs as expected in the Docker container. The best solution would be if you could combine the development tools of a Python IDE with the consistent test and execution results of a Docker container. Running a docker container on a local machine is quite easy. Though setting up your container for debugging is not always straightforward. Luckily Microsoft’s Visual Studio Code Remote Development Extension offers a functional and easy to use solution.
1. Download and Install VS Code on your machine
Either use this link to download the VS Code or, if you are on Linux and have snap installed, just run (for this tutorial v1.56.2 was used):
sudo
snap
install - -classic
code
If you have not already installed Docker, download and install it here.
2. Pull/Create your project that includes the relevant Docker file
In most cases you are going to be using git, so just set up a new git-repository via the terminal, VS Code’s built-in console or VS Code’s git extension. This project should, of course, include the Docker file that is used for deployment and which behavior you want to mimic locally.
If you just want to try out how this all works, you can clone our SDK from its GitHub page and add a Dockerfile with the following content:
# simple docker file
FROM python:3.8-slim

ADD setup.py /code/setup.py
ADD konfuzio_sdk /code/konfuzio_sdk
ADD README.md /code/README.md

WORKDIR /code/

RUN python3.8 -m venv /opt/venv
ENV PATH="/opt/venv/bin:$PATH" VIRTUAL_ENV="/opt/venv"

RUN pip install -e .
RUN pip install pytest
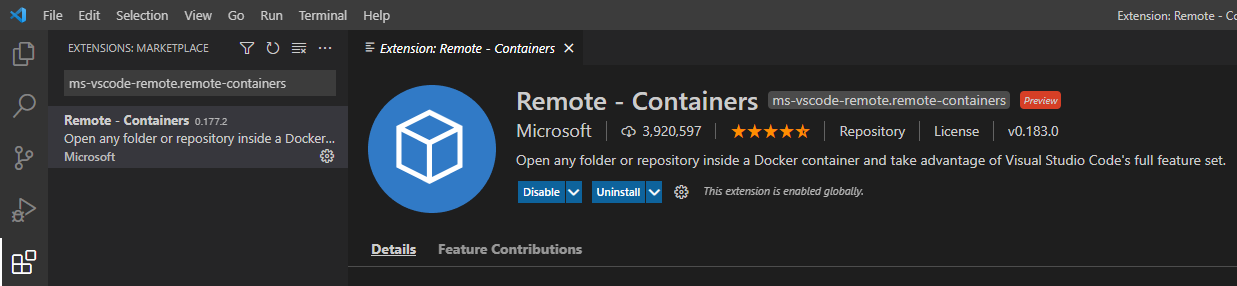
3. Install the remote development extension
In VS Code open the extensions tab (its icon is located in the left sidebar) and search Remote - Containers (or for its ID: ms-vscode-remote.remote-containers). Install the extension.
4. Set up your remote development environment
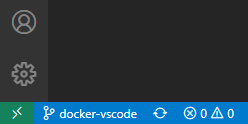
You should now be able to find the remote extension’s symbol (arrows on a green background) in the bottom left corner of the VS Code window (picture below). Clicking on the symbol opens the extension’s command pallet, which from now on is going to be our main access point to the extension.
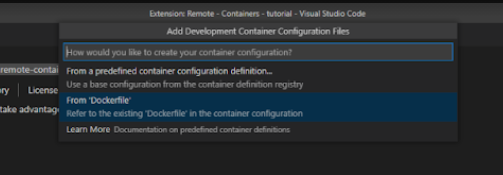
In the Command Pallet (‘View’ > ‘Command Pallet’) select ‘Remote-Containers: Add Development Container Configuration Files’ > ‘From $your_dockerfile’
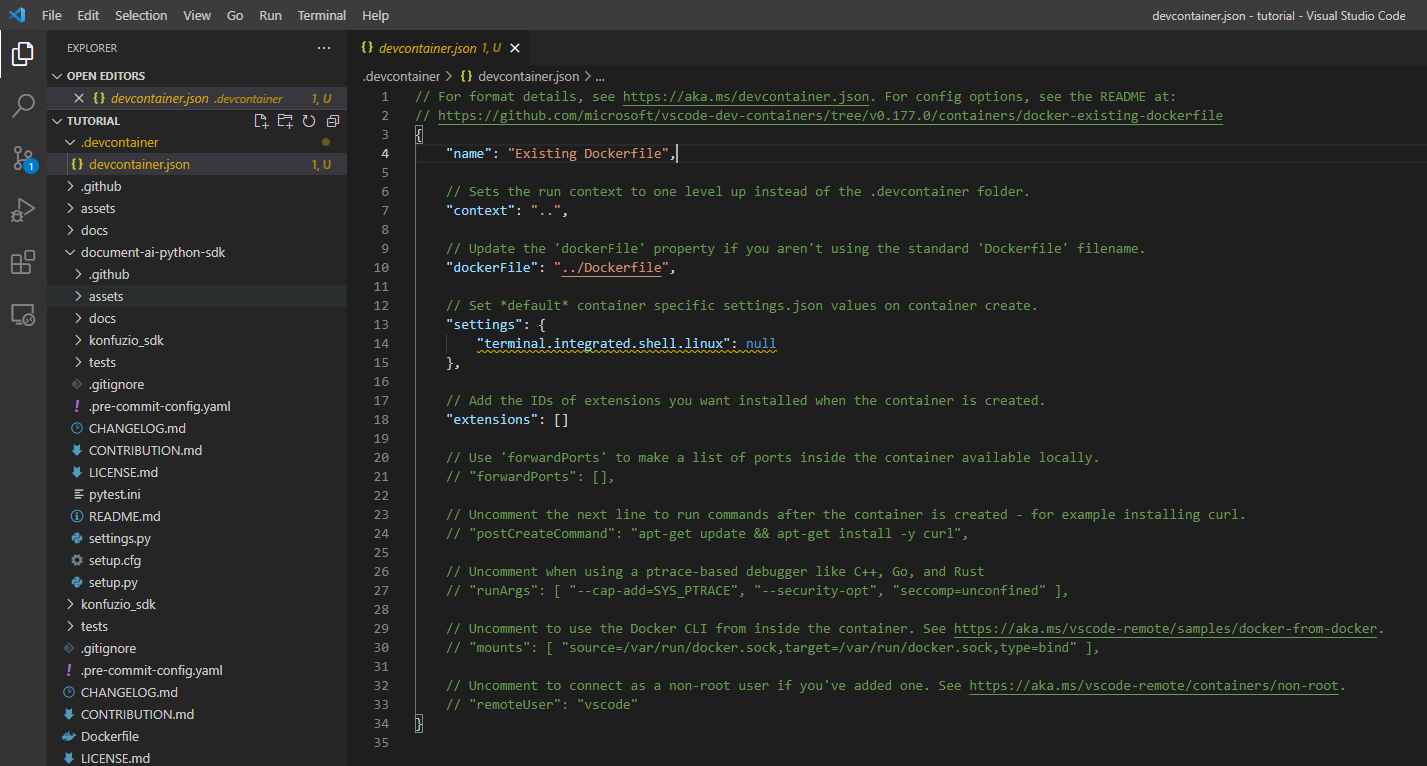
Now you should see in the file explorer under .devcontainer your devcontainer.json file. Open it. These are the basic configurations of your devcontainer. Most of this can be left unchanged. Maybe give your container a name by changing the ‘name’ variable. Additionally, you should specify all the ports you need inside your Docker container in ‘forwardPorts’. If you are working with the sample project you do not need to specify any ports.
5. Build and run your Docker container
Open the extension’s command pallet by clicking on the arrows in the bottom left and search for ‘Reopen Folder in Container’. If you are doing this the first time, this builds the Docker container and thus can take quite a bit of time.
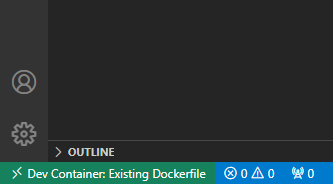
To confirm that you are now inside the container look again to the bottom left. You should now be able to see ‘Dev Container: $your_name’ next to the two arrows.
6. Install the Python extension inside the Docker container to debug and run Python files
Again open up the extensions tab (now inside the Docker container) and install the Python extension (ID: * ms-python.python*).
Now you can debug/run any Python file you want. Open up the chosen Python file and the ‘Run and Debug’ tab by clicking the run/debug icon that should be now available on the left taskbar.
Click ‘Run and Debug’ > ‘Python File’ and you are good to go. Before make sure to set the needed breakpoints by clicking to the left of the line numbers.
If you want to evaluate certain expressions while debugging, open up the terminal (if it is not open already) by clicking ‘View’ > ‘Terminal’. One of the terminal’s tabs is the debug console, where you can evaluate any expression.
If you are in the sample project you can make sure that the Docker container works as expected by entering the tests folder (‘cd tests’) and executing:
pytest - m
local

Additional Tips
If you want to switch back to your local machine (to e.g. switch branch), open the extension’s command pallet by clicking on the arrows and select ‘Reopen Folder Locally’.
If you want to rebuild the container, because e.g. a different branch uses different dependencies, open the extension’s command palette and click ‘Rebuild Container’. (This of course means that you have to reinstall the Python extension - if this becomes annoying you can specify its ID in the devcontainer.json file to be pre-installed with every rebuild).
How to write documentation?
Guidelines for Sphinx Documentation
If you’re working on the SDK and need to update the documentation, here are some guidelines on how to add new pages and manage assets such as images in our Sphinx documentation.
Adding New Content and Pages
When you want to add new content or create a new page:
Create a separate folder for your new content in the appropriate directory within the
docsfolder. The name of this new folder will form part of the URL for the new page.Within this new folder, create a new
index.rst(reStructuredText) orindex.md(Markdown) file. This file will be the main page for the new content.Write your content in the
indexfile using the appropriate syntax. If you’re new to reStructuredText, check out this quick reference.To make your new page discoverable, add it to the appropriate
toctreedirective in an existing.rstfile that’s one level up in the directory structure. For example, if your new page is a subsection of an existing page, you would add it to that page’stoctree.
Organizing Images and Other Assets
When adding images or other assets to the documentation:
Place all images or assets related to your new content within the same folder you created in step 1 above. This helps keep our documentation well organized and makes it easier for other contributors to find and update assets related to specific content.
When referencing an image in your documentation, use a relative path from the current file to the image. For example:
.. image:: my-image.pngIf you’re adding the image through the GitHub web editor and it automatically creates a different assets folder, please manually move the image to the correct folder as described above.
Remember, clear and organized documentation makes it easier for users to understand and effectively use our SDK. Thank you for your contribution to improving our documentation!
After adding this section, the next steps would be:
Add the guidelines to the relevant section of the Documentation.
Open a PR for your changes.
Ensure that the changes are correctly reflected in the Sphinx documentation.
Merge the PR after review.